
The Contacts feature in Cashflow.io gives you full control over managing your contacts, making it easy to view, update, and maintain essential information. The article will outline the following points:
- Viewing a Contact
- Edit a Contact's Profile
- Edit a Contact's Billing Details
Viewing a Contact
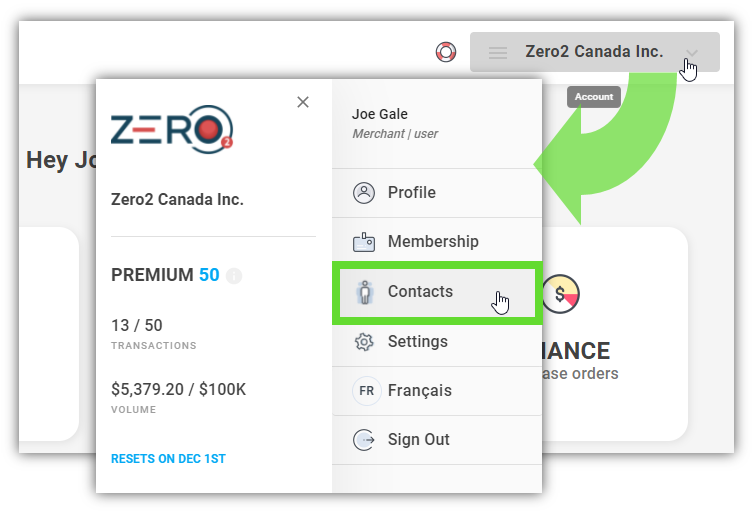
- On the upper right of the page, click the Account Menu and select Contacts.
- You will be directed to the Contacts page. Find and click the contact that you want to view or edit from the list.
-
- Note: you can use the Search Bar or the User Filter to narrow your search.

- Note: you can use the Search Bar or the User Filter to narrow your search.
-
- You will be directed to the selected contact’s information page. On this page, you can view the contact's information, all recent transactions (payables, receivables, recurring, eQuote) and their billing details.

Edit a Contact's Profile
- To update the contact information, click the Edit (Pen) icon next to their name OR select the Profile icon below.

- The contact's information will appear below. Edit all the necessary information then select the Submit button to save the edits made.

Edit a Contact's Billing Details
- To edit the contact's billing details, select the Billing icon below.

2. In the contact's billing page, select the appropriate payment gateway and payment type (credit card or bank transfer) then select either Add a new credit card or Add a new bank account. Enter the required information and click Save.
The contact's billing details will be tokenized and can be used for manual payments without re-entering their payment information.